Exports Management Made Easy
The 'Exports' feature is key in extracting reports and data to run a business better. Omnify already has this amazing feature for viewing Bookings, Clients, Sales, Attendees in a Class, and so on that gives businesses the ability to gather all sorts of information over time. Businesses can then access this information related to clients' data, attendee list, bookings, etc., export it onto a .csv file and utilize it for bookkeeping, analytics, maybe run a sales report, go for a business backup, and more.
What was missing?
With the older Exports version, businesses could get reports on their exports, whether completed, canceled, or in the queue. While this was great, we heard from our customers that it left room for probable duplication of export of reports because there was no info around those files. The revamped Exports version allows greater scope for businesses to draw thorough insights on managing their exports.
What’s New?
1. Exports Page
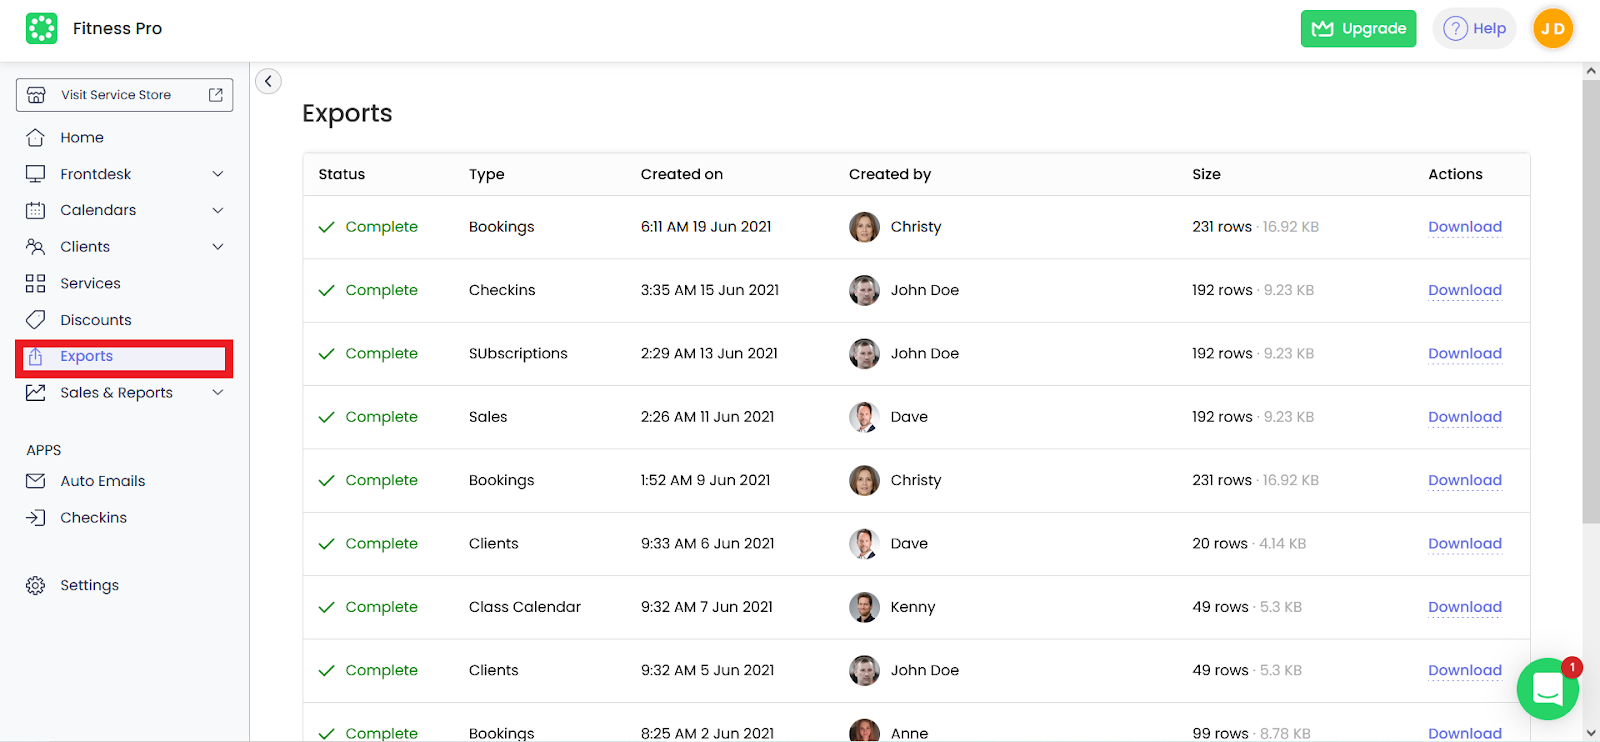
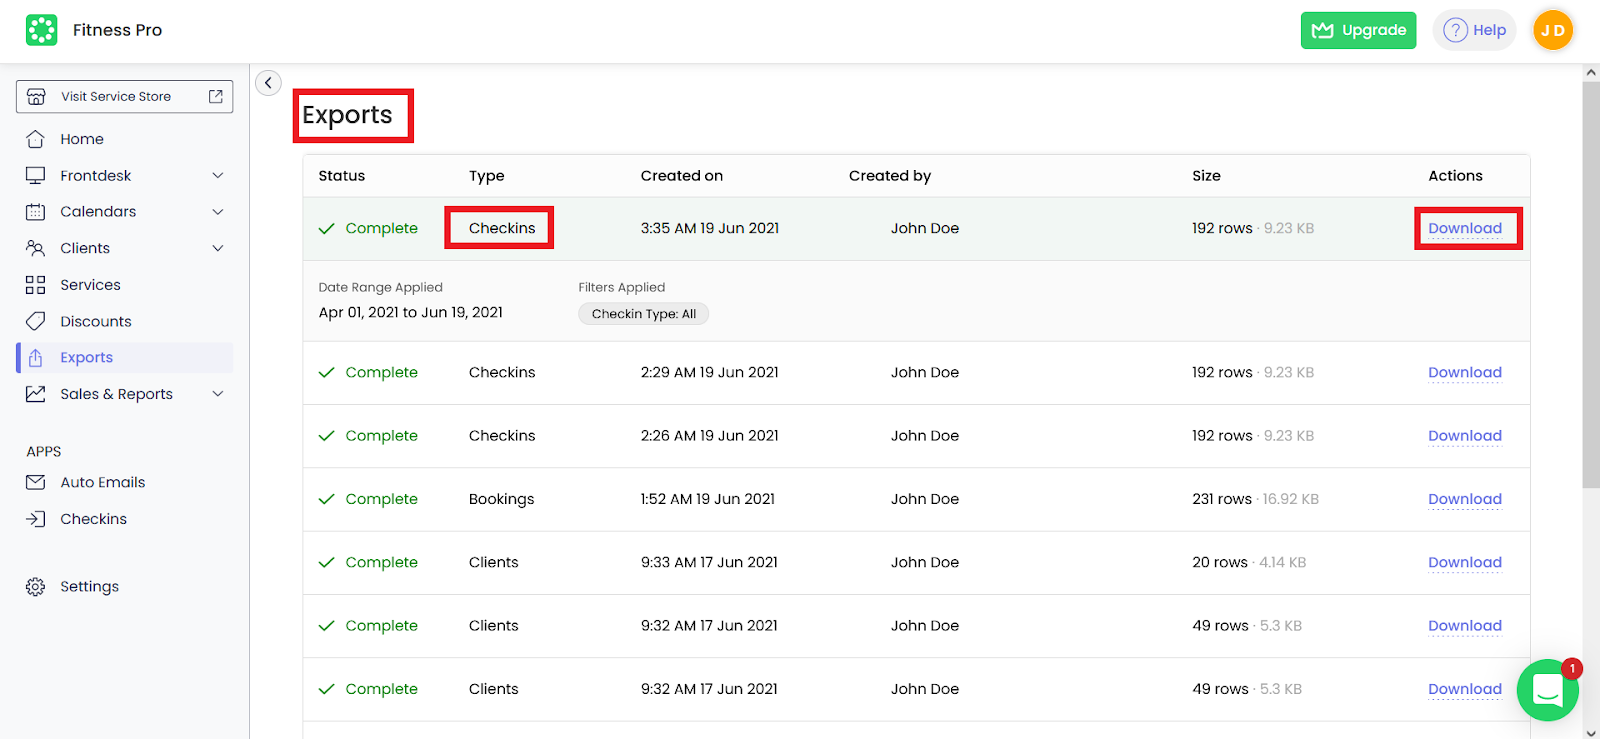
We have a brand new home for exports. This new update is designed to give customers the leeway to manage and access the downloaded reports within the dashboard. The introduction of a dedicated page on Exports on the dashboard comes with new, improved metrics such as Exported by, Size of Export, data on 'Filters Applied,' etc., giving you the information about who requested the export, the critical details about the export, etc.
More than anything, now you can find your reports on one single page.
Just two simple steps-
On the Omnify Dashboard > EXPORTS > List of Exports
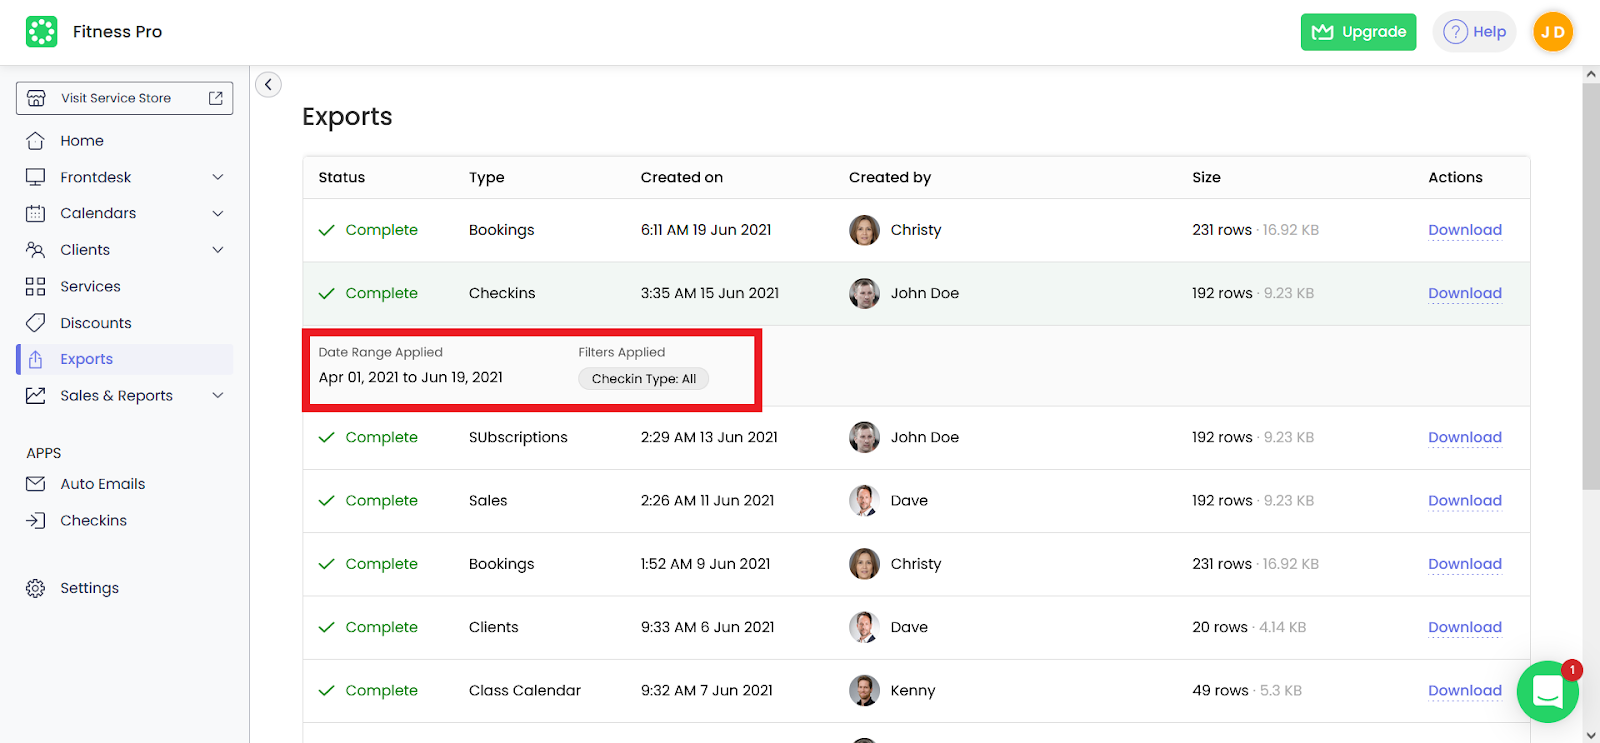
Here, the "filters applied" show you what filters were used while doing a particular export.
2. Check-ins Export
We’ve added Exports to Check-ins!
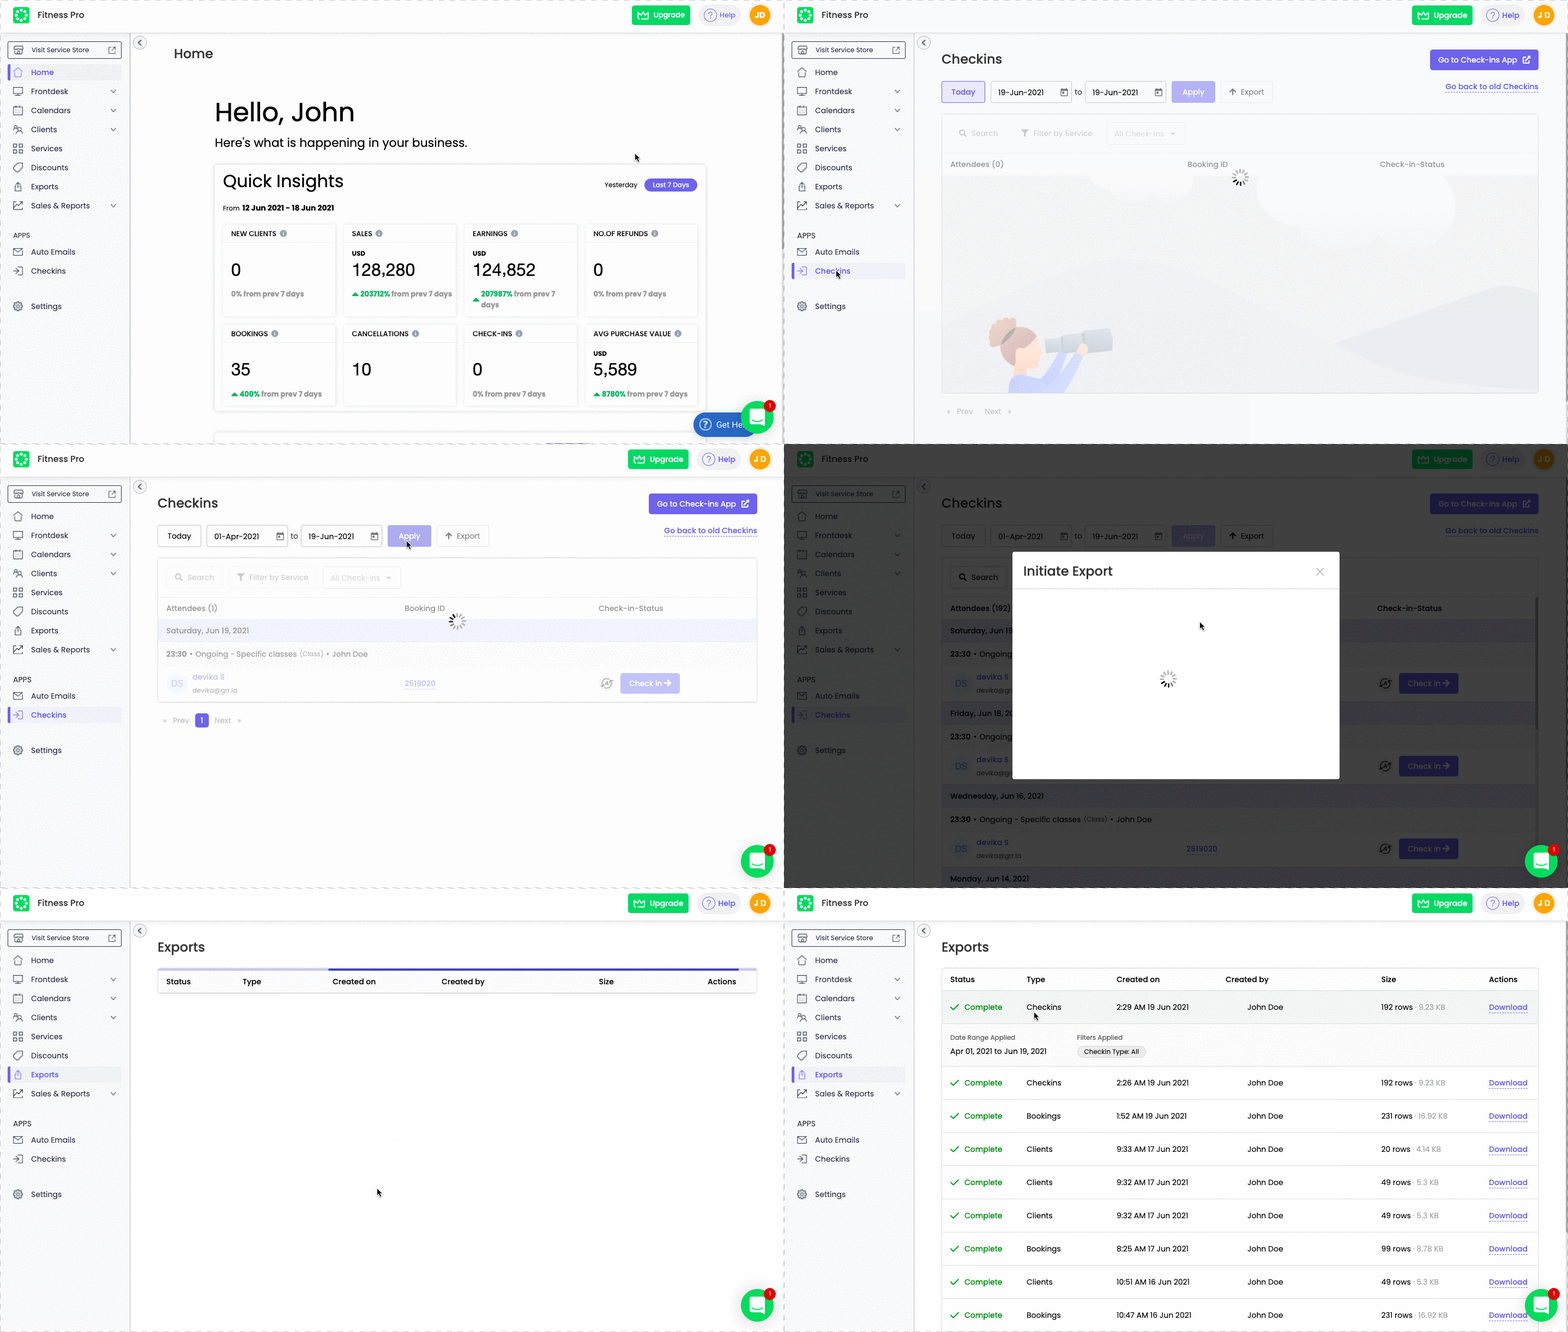
Omnify’s Revamped Exports comes with a couple of new features. One addition unique to this release is the Check-ins Export. Business admins will now be able to take multiple exports throughout the day for daily operations like client check-ins.
For Exports on Check-ins, follow these simple steps-
On the OMNIFY Dashboard > Go to Check Ins > Select Date and Apply > Press the Export tab on that page> Initiate Export pop up comes > Press Initiate Export > pop up that redirects to the Exports page.
*For any other Exports type, you can follow similar steps by navigating to that particular page.
3. Export Initiation confirmation with last exported information
This new pop-up window for ‘Initiate Export’ displays information on the ‘Last Export Done’ and ‘Any other Exports in progress’, hence, completely omitting the chance of duplicacy of exports*.
(*Note: The last export info only appears if the export of the same type was taken earlier.)
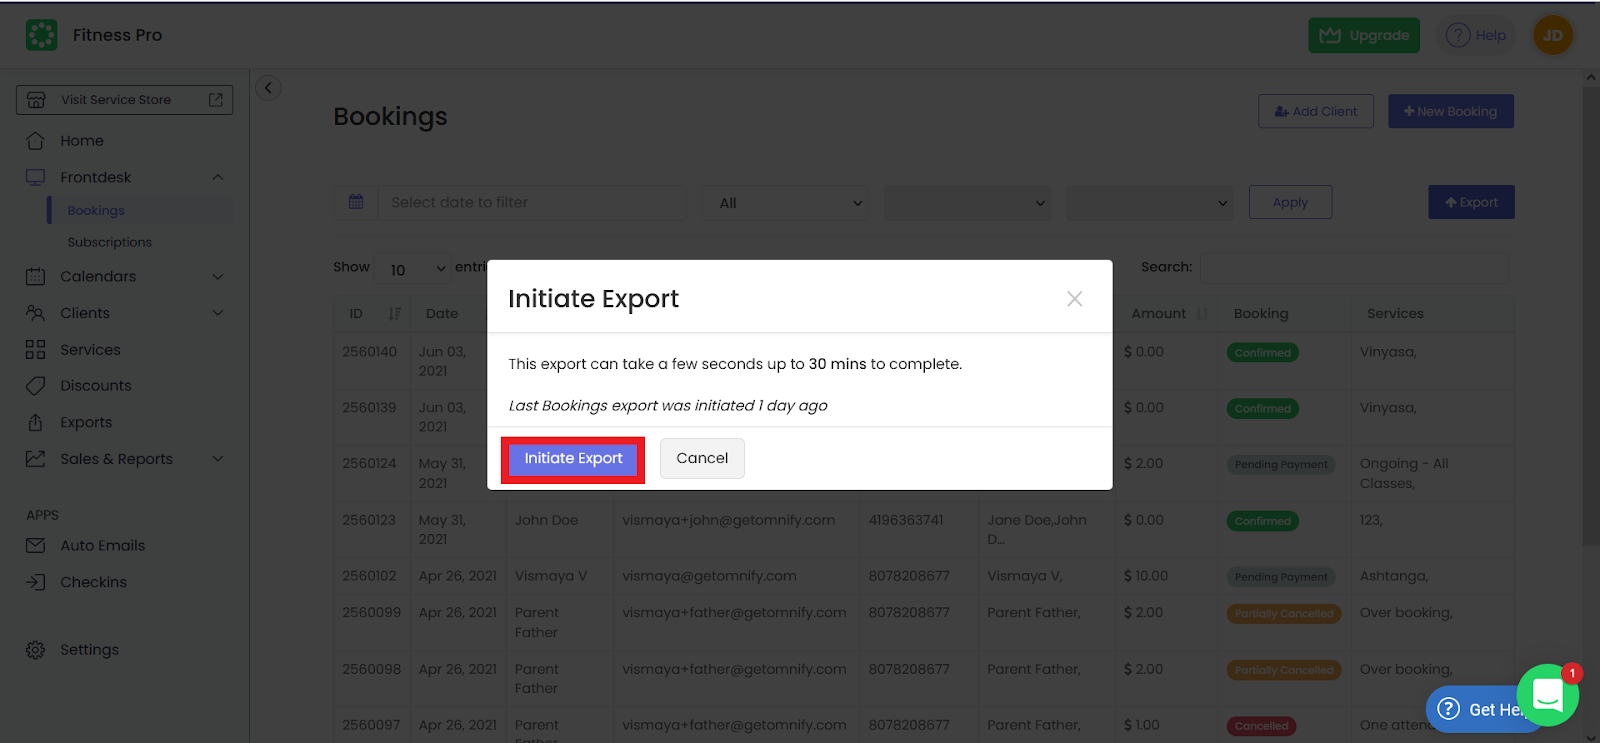
Once you press ‘Initiate Export’ on the pop up window above, you get this new pop-up message that gives a confirmation on a successful initiation of your export. This is what exactly appears-
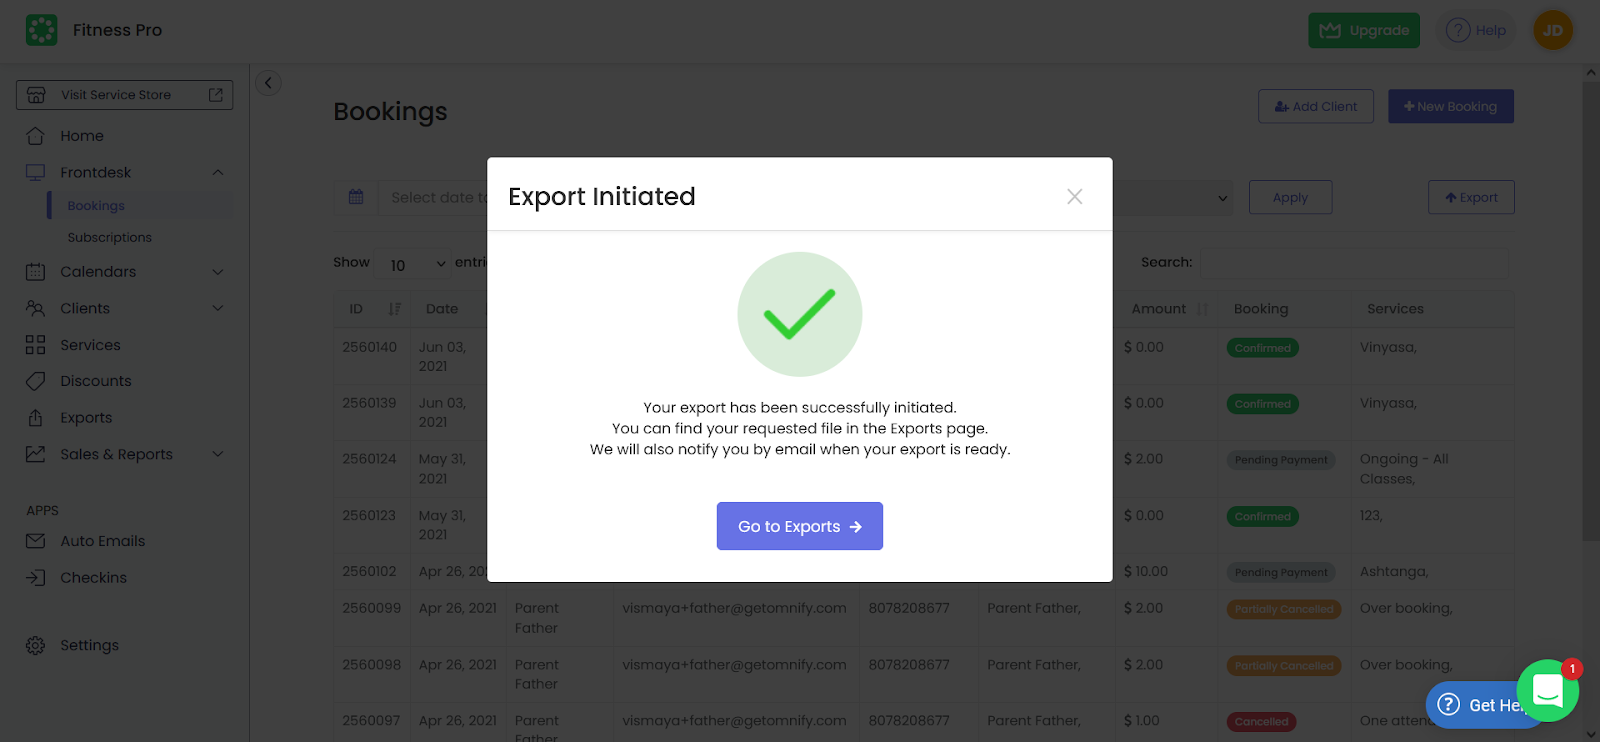
Selecting the Go to Exports button will redirect you to the Exports page from where you can download the files.
Enjoy this new and improved version of Exports that is aimed towards building a transparent and comprehensive exports management system.
Also, Let us know what you think about our new update. Please share your feedback on hello@getomnify.com
With love,
Team Omnify 💚
This update brings a transparent & comprehensive export management system with a new home for exports, check-ins data export & insight on all exports


